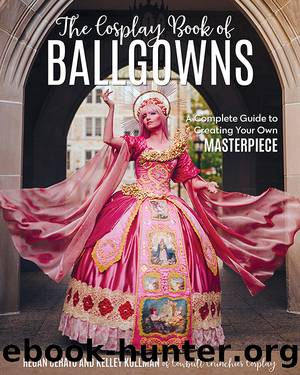
The Cosplay Book of Ballgowns by Kelley Kullman

Author:Kelley Kullman
Language: eng
Format: epub
Publisher: C&T Publishing
GATHER AND JOIN THE TIERS
1. Gather the unhemmed edge of the bottom tier to match the length of the adjacent tier.
2. With right sides together, nest the adjacent tier inside the bottom tier, with edges pinned together. Sew the tiers together, adjusting the gathers as needed. The bottom tier should pouf out a bit where it hangs from the adjacent tier.
3. Repeat the gathering method of choice to connect the remaining tiers. Gather the free edge of the top tier to match your waist measurement.
4. Before adding the waistband, try on the petticoat, with a hoop skirt, if applicable. Consider volumeâhave you achieved the shape and size you want? Keep in mind that heavy skirt fabric can compress the petticoat down significantly, so it might be a good idea to make it just a little poufier than your final desired size.
5. Once you are happy with the shape and volume of the petticoat, you can move on to the waistband.
Tip
Adding Petticoat Volume
If you want more volume, itâs as easy as cutting and gathering more tiers, using the same measurements and instructions as for the original petticoat. You donât necessarily have to create a complete second layer with four tiers, especially if you are only looking for more flare; you can add additional layers starting at any of the tier seams to add volume below that point.
â¢For a more mermaid-style flare, or extra pouf and body only at the bottom of the petticoat, cut and gather an additional bottom-tier piece and attach it to the same seam that joined the original bottom tier to the one above it.
â¢For more body throughout, make an extra layer with the second, third, and fourth tiers and sew it to the same seam that joined the original top two tiers.
â¢Experiment and add partial layers or extra tiers as you choose. However, we advise not connecting more than two gathered tiers to any single-layer tier above itâso if you find you need three pieces of the bottom tier to get the amount of volume you want, you need to attach them to at least two layers of the adjacent tier.
MAKE THE WAISTBAND
We suggest a 2Ë finished waistband, which is wide enough to be comfortable and secure, but narrow enough that additional tailoring to fit your waist isnât needed.
1. Use a sturdy, non-stretch fabric like twill or heavy cotton. Cut 1 piece on the fabric grain 5Ë wide by your waist measurement + 4Ë.
2. Press Â½Ë to the wrong side on each long edge.
Download
This site does not store any files on its server. We only index and link to content provided by other sites. Please contact the content providers to delete copyright contents if any and email us, we'll remove relevant links or contents immediately.
| Decorative Arts | Design History & Criticism |
| Furniture Design | Industrial & Product Design |
| Interior & Home Design | Jewelry Design |
| Textile & Costume |
POP by Steven Heller(2888)
Japanese Design by Patricia J. Graham(2562)
The Power of Broke by Daymond John(2379)
Architecture 101 by Nicole Bridge(2356)
Fusion 360 for Makers by Lydia Sloan Cline(1989)
Indistractable: How to Control Your Attention and Choose Your Life by Nir Eyal(1940)
Origami Art by Michael G. Lafosse & Richard L. Alexander(1740)
Actionable Gamification: Beyond Points, Badges, and Leaderboards by Yu-kai Chou(1734)
Batik by Rudolf Smend(1724)
Homebody by Joanna Gaines(1713)
Worn in New York by Emily Spivack(1623)
Feng Shui by Stephen Skinner(1620)
Whiskey in a Teacup by Reese Witherspoon(1580)
Austin Kleon by Steal Like an Artist(1541)
Don't Make Me Think, Revisited: A Common Sense Approach to Web Usability by Steve Krug(1532)
Simple Gatherings by Melissa Michaels(1514)
Hygge: The Danish Art of Happiness by Marie Tourell Søderberg(1433)
The Joy of Hygge by Jonny Jackson(1346)
The Laws of Simplicity by John Maeda(1303)
